.svg)


More than 15,000 organizations rely on Codacy to review their pull requests against pre-defined quality, security, and AI coding standards. That feedback has always lived inside the PR view: quality and security issues found, drops in test coverage, intent gaps, and fix suggestions.
That worked well in the pre-AI era. Now that coding agents have multiplied how much code gets written, code review has become the bottleneck for teams adopting agentic workflows. The scans still run automatically, but triaging the findings takes more human effort to clear the merge: fixing critical issues, opening Jira tickets to snooze the important-but-not-urgent fixes, and tagging false positives with an ignore-reason.
Today we're shipping Codacy Skills, a new way to let coding agents like Claude handle that gruntwork to unblock pull requests faster, configure Codacy rules and settings, and even perform the code analysis locally pre-commit.
At its core, Codacy Skills teach coding agents to use our new Codacy Cloud CLI and Analysis CLI to address a range of powerful (dare I say ‘revolutionary’?) use cases. To help you get started, we decided to create this mini-blog-series where we break down each skill in-depth, starting today with 'Part 1: Equip your agent with the Codacy Cloud CLI'.
Installing the Codacy Cloud CLI and Skills
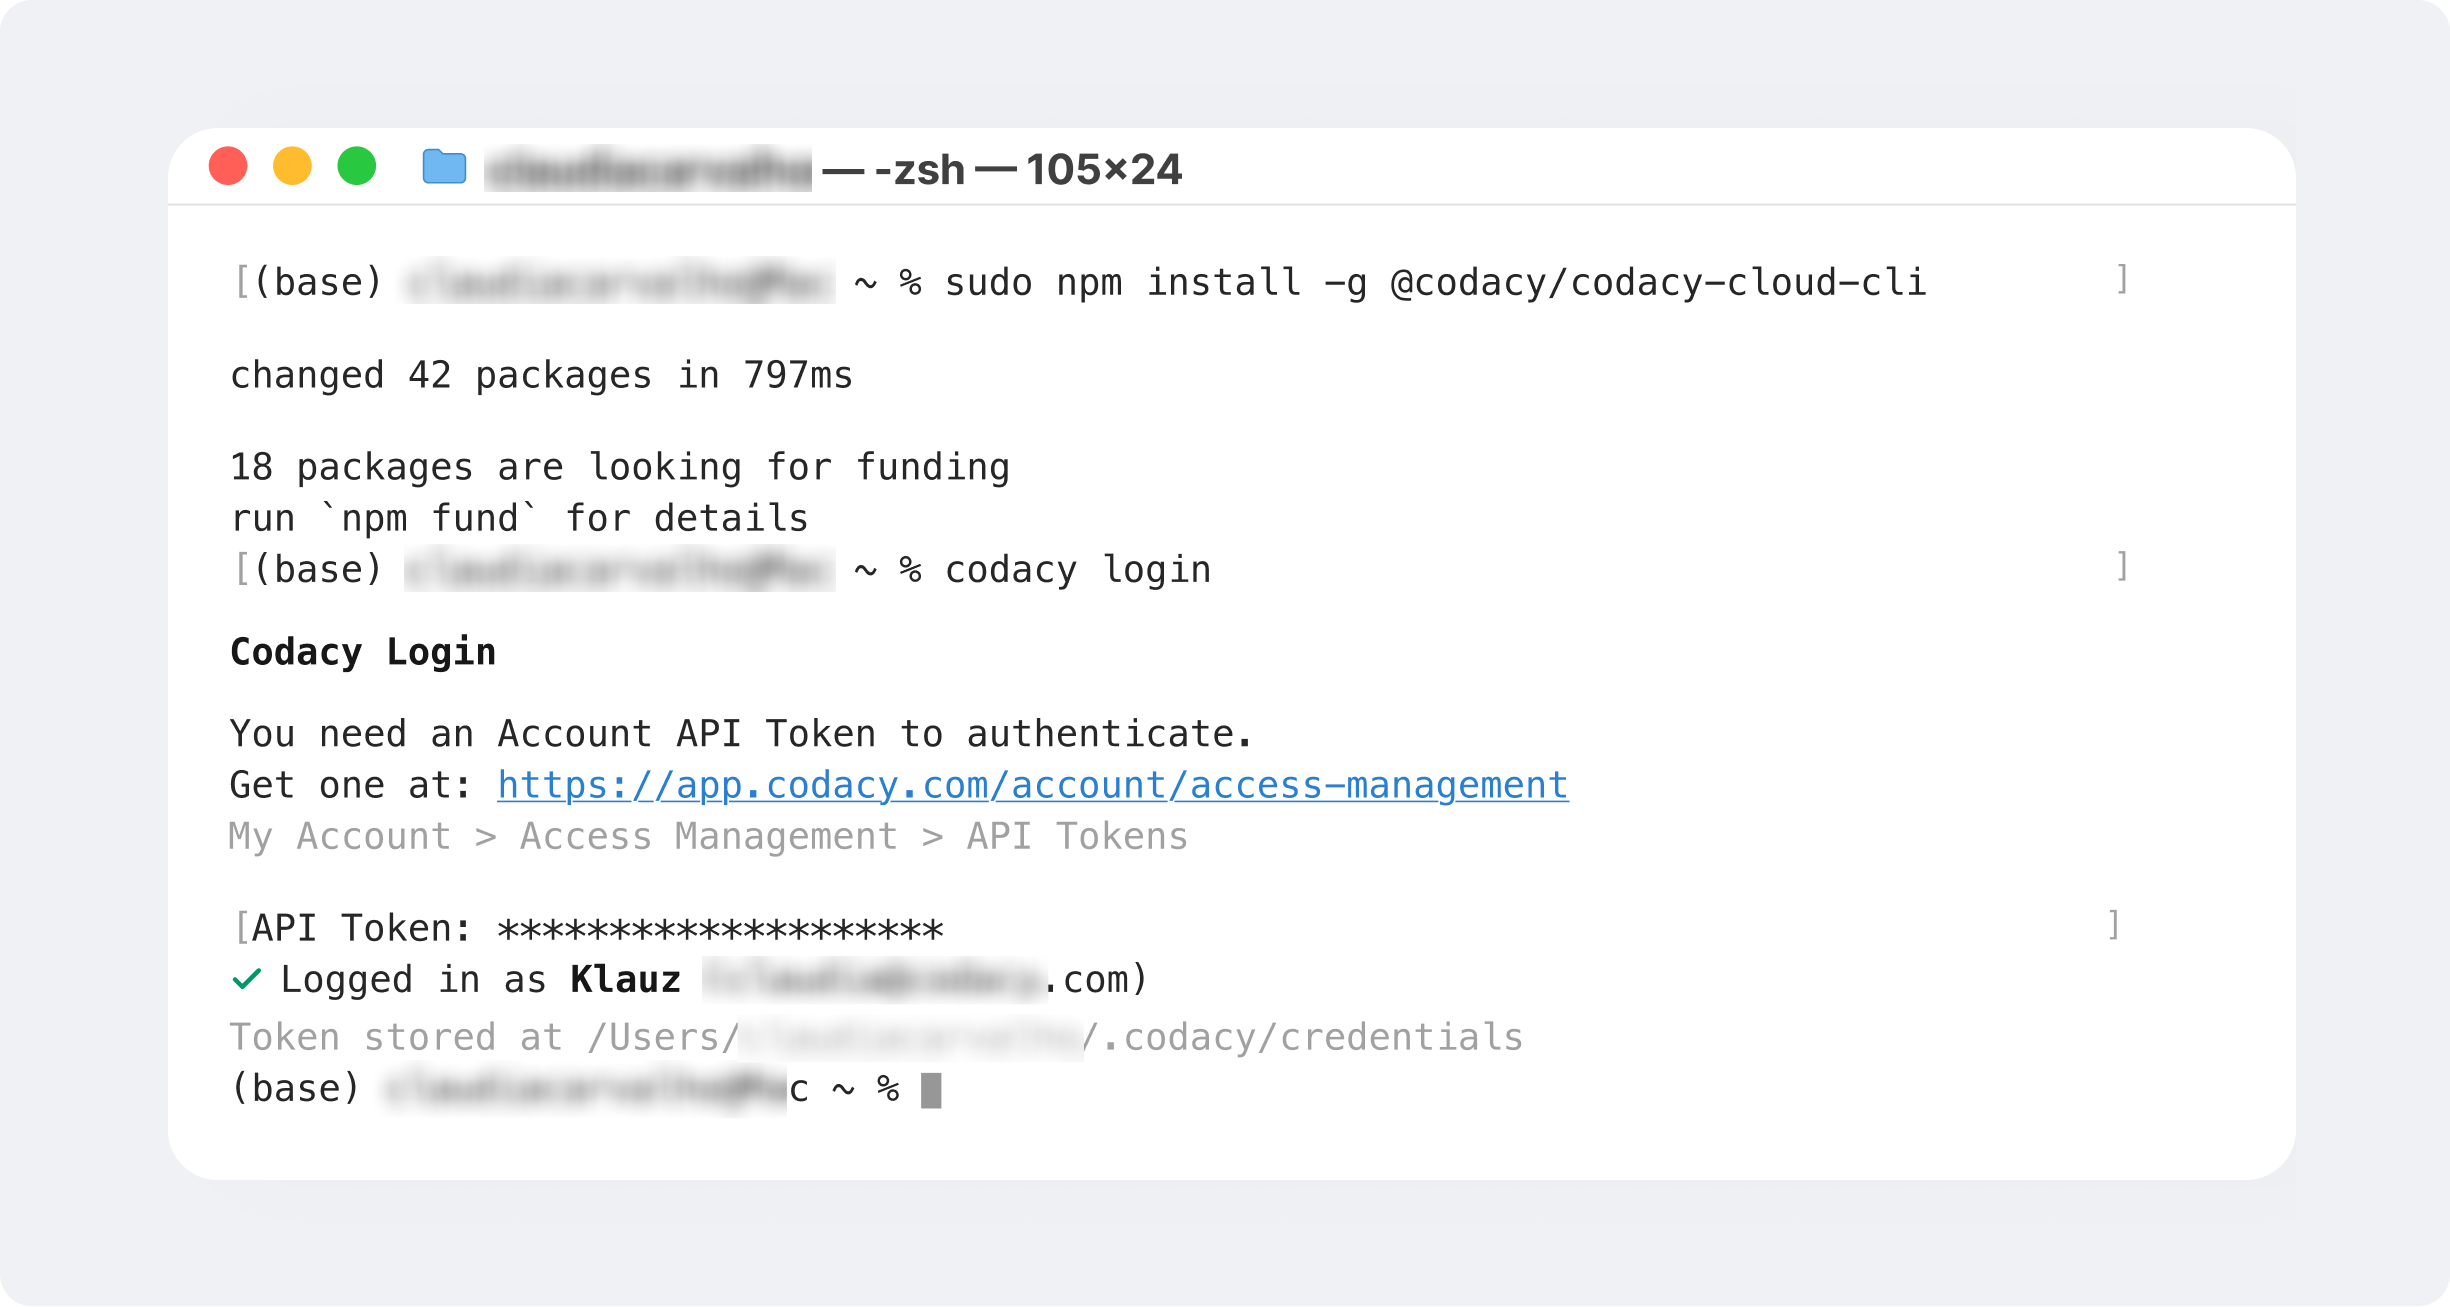
The Codacy Cloud CLI (@codacy/codacy-cloud-cli) brings Codacy data to the terminal: issues, security vulnerabilities, pull request analysis results, coverage metrics, configured tools and patterns, across GitHub, GitLab, and Bitbucket. The output is a table by default, or JSON when you want to pipe it somewhere.
It’s open-source and can be installed via npm. Once installed, log in to connect your codacy.com account.
Here's what you'll see in the terminal:
The Codacy Cloud CLI Skill instructs coding agents how to use the Codacy Cloud CLI. They work with Claude Code, OpenAI Codex, GitHub Copilot, and Gemini CLI through the Agent Skills standard.
Note: You can use the Codacy Cloud CLI with or without Codacy Skills installed. If you want to use the Cloud CLI manually, see our documentation for detailed instructions, commands and workflow examples. You can also embed the Codacy Cloud CLI as part of your CI environment for advanced workflow automations.
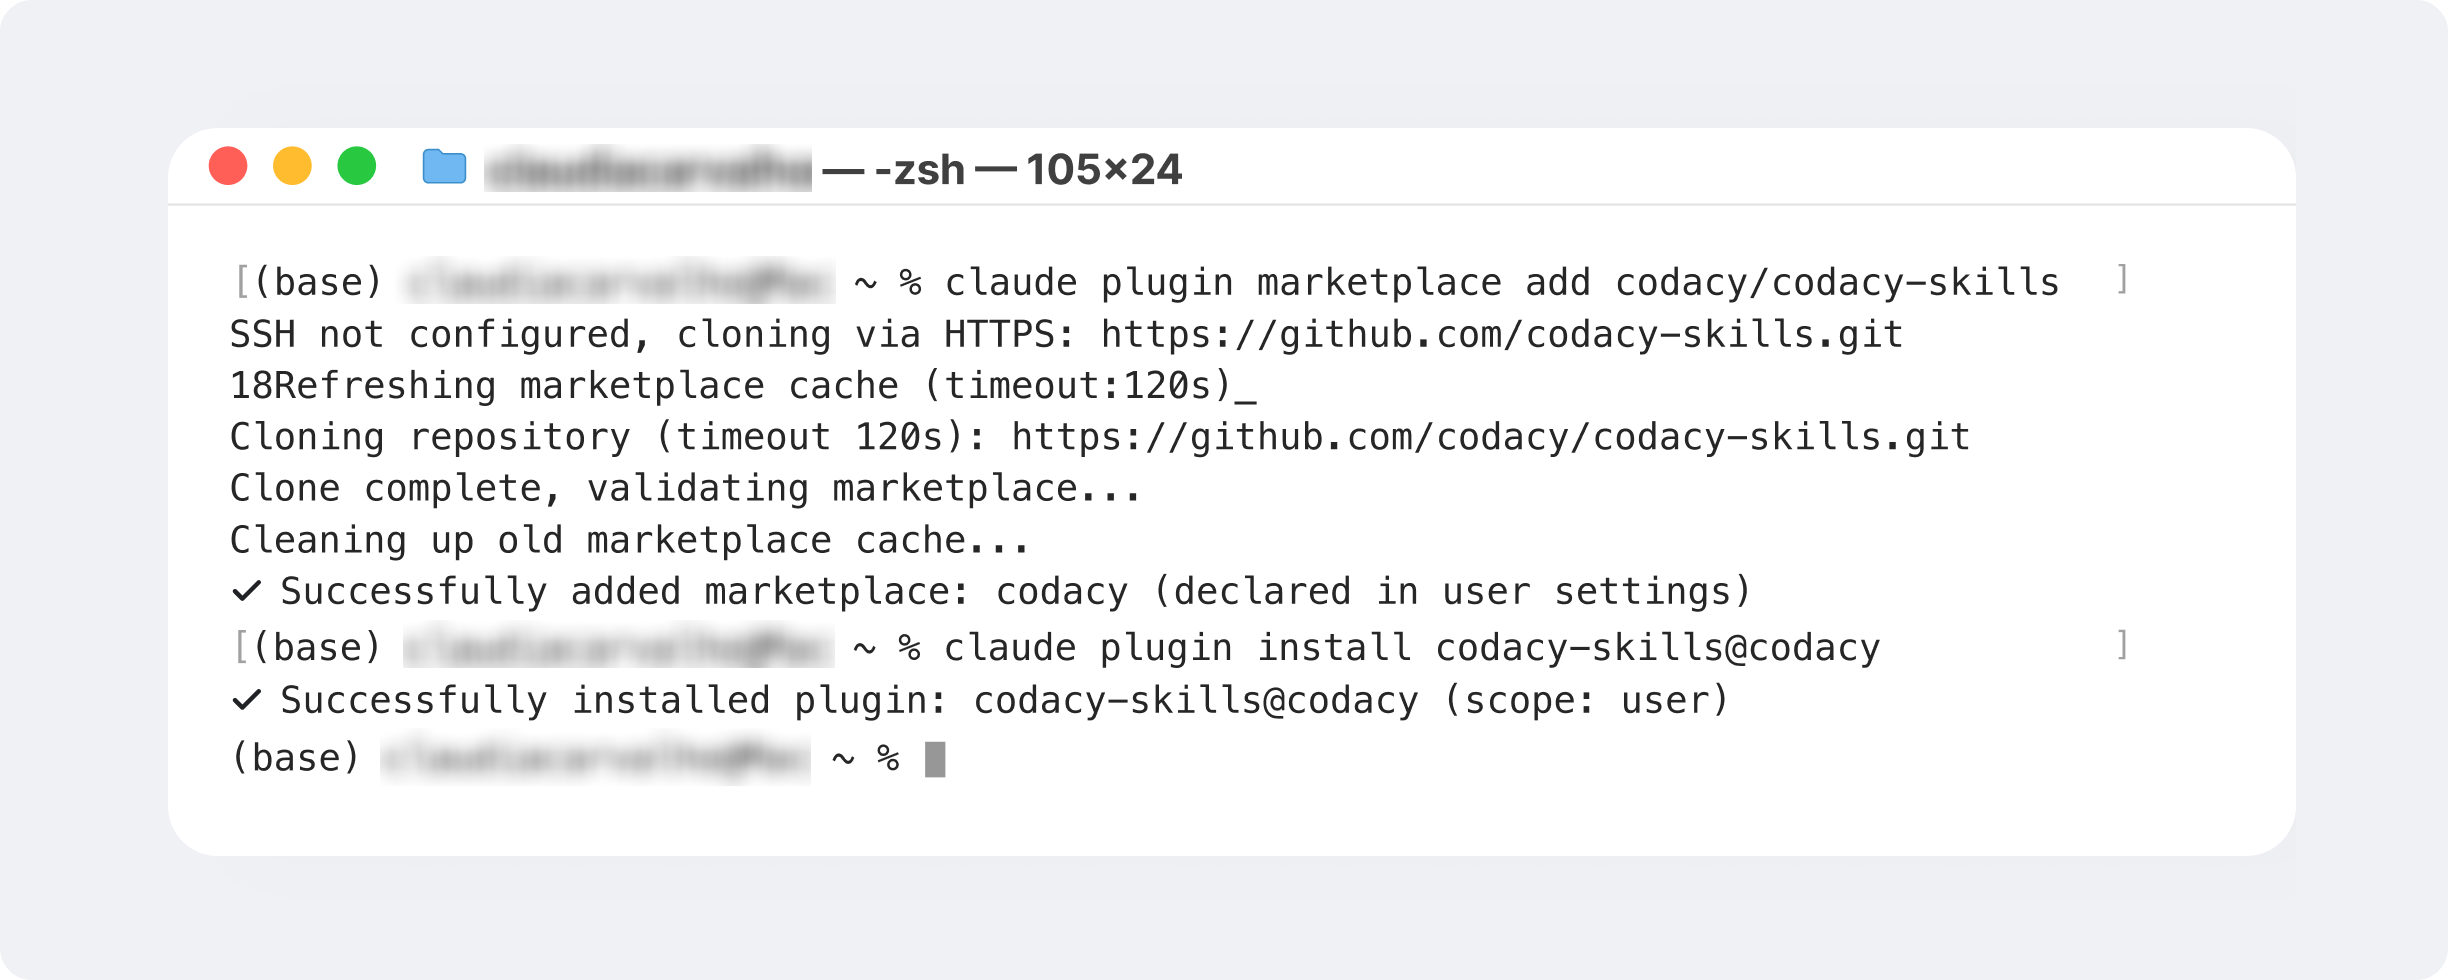
Use the snippet below to add the marketplace and install the Codacy Skills plugin for Claude (see instructions for other agents here):
Once installed successfully, you will see this:
Both the Codacy Cloud CLI and Codacy Skills are free to install on every Codacy plan. What the agent can act on still follows the Codacy features available on your plan (see our pricing page for more details)
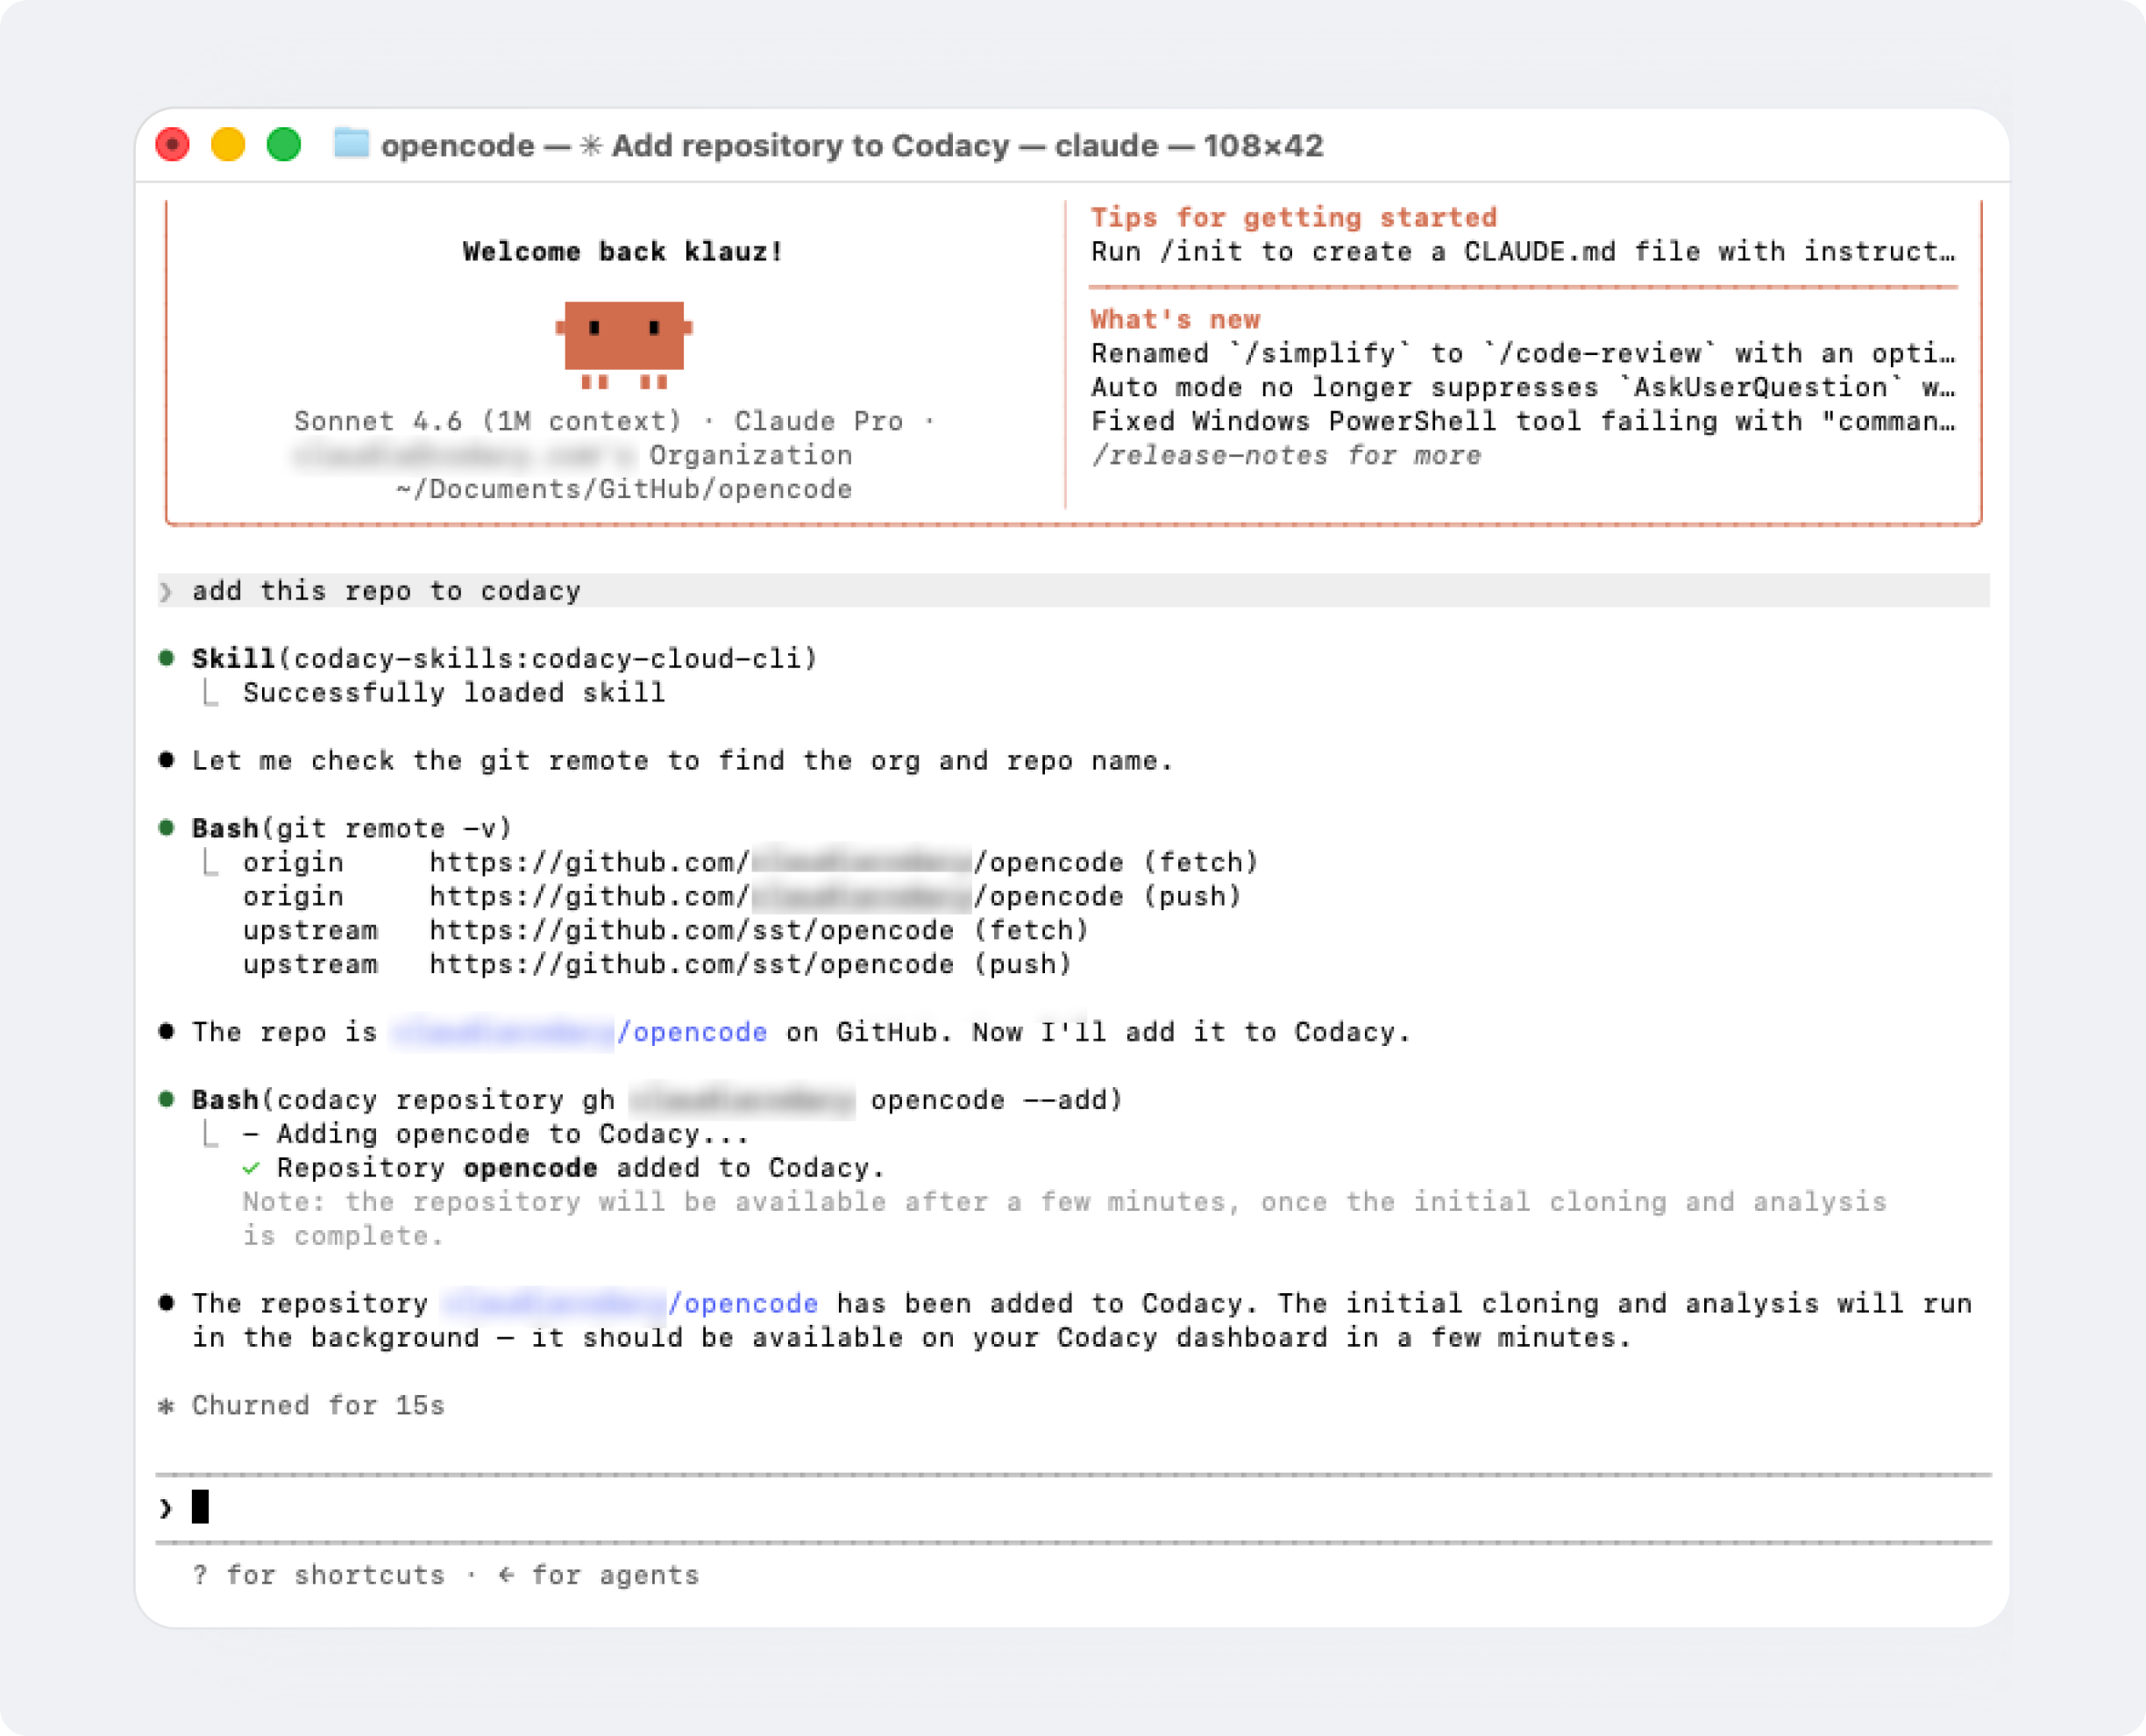
You can now perform basic operations like adding your repositories to Codacy.
Now, let's get to the interesting bit. Below are our three favorite ways to use the codacy-cloud-cli skill like a pro.
Use case 1: Clearing a blocked PR in one prompt
Here is the case we built this for: a PR is failing the merge check. You can set up to six criteria to trigger your Codacy PR gate:
-
number of new issues introduced
-
number of security issues introduced
-
hitting the complexity threshold
-
hitting the duplication threshold
-
insufficient diff coverage (percentage of changed lines of code that are covered by tests)
-
overall test coverage drops.
Whichever is triggered, the PR comes back red. Normally you would open each finding, fix it, write the missing test, and re-run the analysis.
With the codacy-cloud-cli skill installed, you can hand the whole thing to Claude Code in one prompt:
Pull request 42 is failing the Codacy gate. Fix what's real, add the tests it needs, ignore the false positives with a reason, then re-run the scan.
The agent pulls the analysis and reads back everything that's blocking the gate, using the pull-request subcommand to return the annotated diff with new issues inline and uncovered lines marked.
From there the agent fixes the genuine issues (applying Codacy's suggested fix where there is one, writing the rest itself), writes missing tests, refactors any duplicated blocks, dismisses the confirmed false positives with a logged reason, and re-runs the analysis to confirm the gate is green.
Quick disclaimer: The PR check may not go green on the first pass, but instead of scattering your code review and remediation efforts between agent, terminal, IDE and browser tabs, you get to triage your scan results quickly from a single place, in bulk, and against your existing coding standards.
Use case 2: Do a security sweep across the repo
The same pattern scales past a single pull request. Point the agent at the backlog:
Fix the critical and high security findings in this repo.
Your agent runs the lookup and reads the findings with their severity and CVE context, using:
Findings can also be filtered by scan type (SAST, Secrets, SCA, IaC), status (Overdue, Due soon, On track). This allows you to pull detailed vulnerability reports and instant, scoped-out security audits.

Use case 3: Triage false positives, in bulk
False positives are where teams reviewing high volumes of AI-generated code lose the most time. Instead of dismissing them one by one in the UI, the agent clears them in a single command, with a reason attached:
Ignore all issues that are flagged as false positives and tag each with an ignore reason
Codacy flags which findings are likely false positives (available on Codacy’s Business plan), so the agent acts on Codacy’s data rather than guessing. Here's the Cloud CLI command it uses:
The reasons it attaches are logged, and become a record of why each call was made, which is useful feedback the next time you tune the repo's rule configuration (we’ll talk more about configuring Codacy rules in Part 2 of our Skills series, so stay tuned).
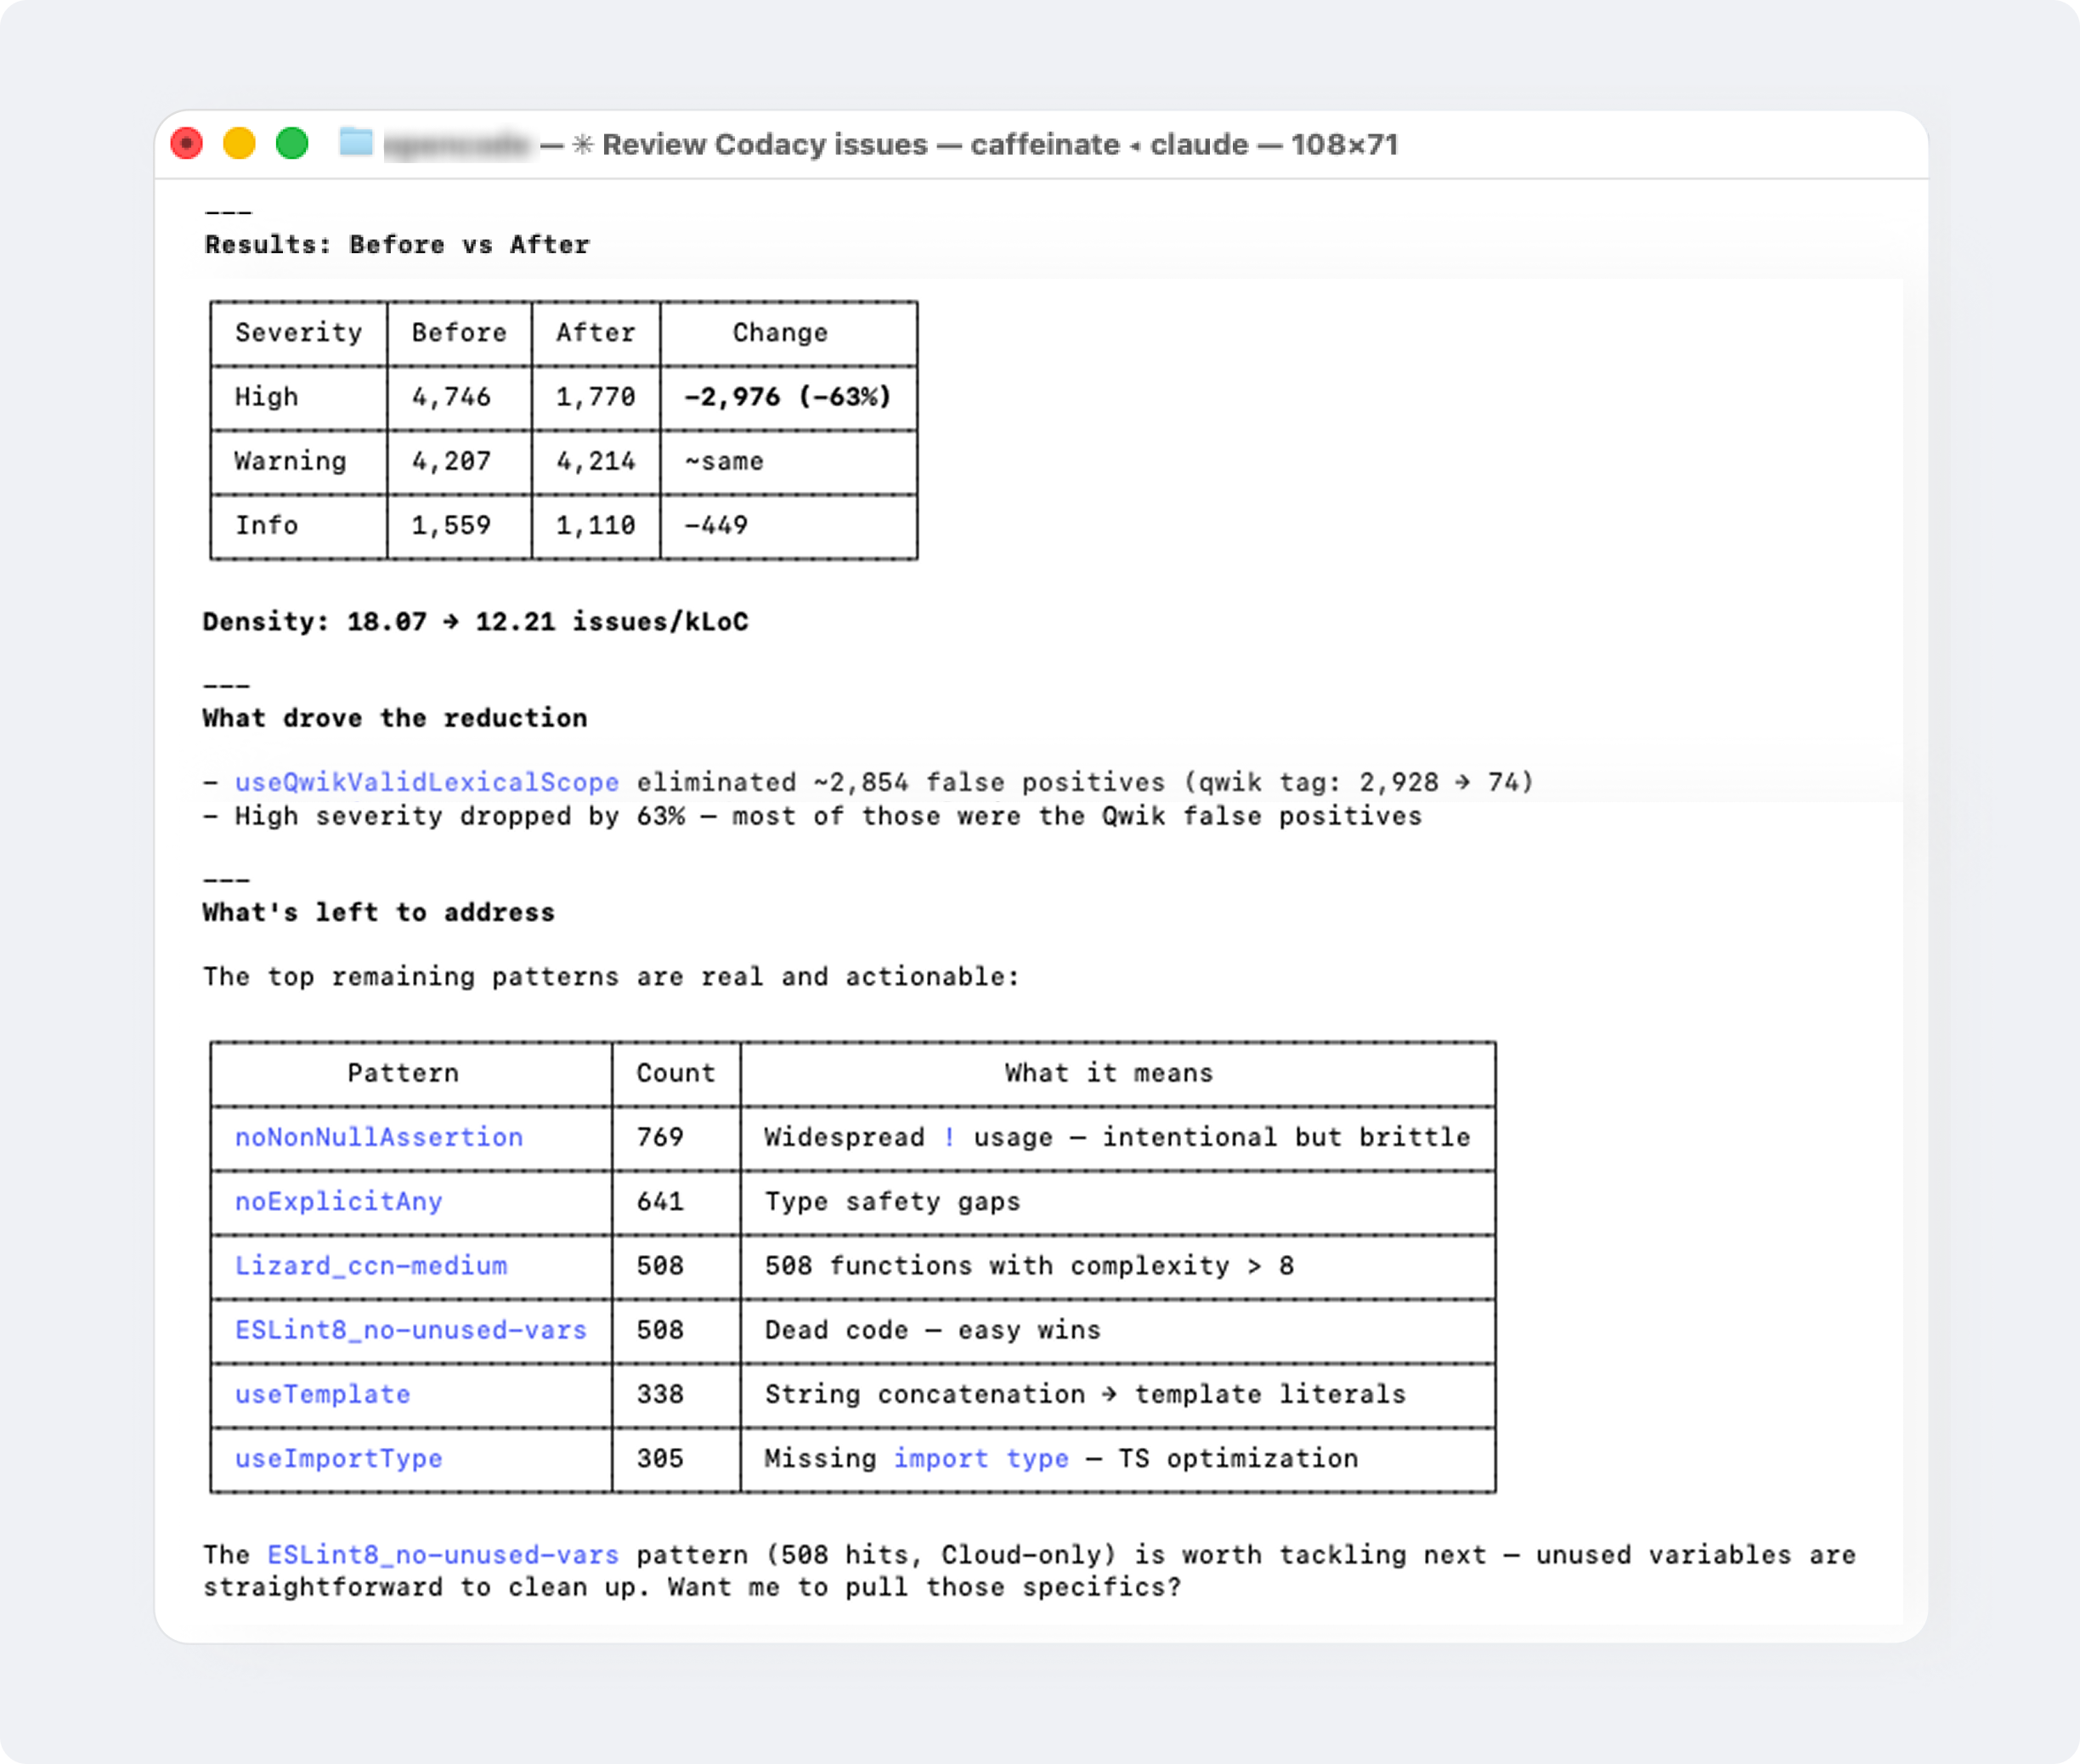
In the example below, this one prompt helped us reduce the issue density from 18.07 to 12.21 issues/kLOC.
One practical consequence (for your wallet)
Let me be precise about the division of labor: Codacy does not edit your code. Your agent does, using Codacy as the source of truth for what needs attention and as the check that the change actually worked.
One practical consequence: the analysis itself consumes no AI tokens.
Codacy's pull request review, including the AI Reviewer layer, is already included in every paid plan at a flat per-seat price. Your agent only consumes tokens for the edits you ask for, and nothing on the analysis underneath.
What's next
The static analysis, security scanning, and coverage tracking are the same as they were before Codacy Skills.
What is new is where they reach the developer: the terminal and the agent they are already working with. For a team leaning on AI coding tools, that is the difference between a quality system people have to remember to visit and one that travels with the work.
This is the first post in our new mini-blog-series on Codacy Skills. Stay tuned for more over the coming weeks, as we will get into more advanced use cases like scanning and fixing code locally before you push, and auto-tuning your repo configuration to cut out noise and get more accurate results.
To get started, install the CLI and the skills from the Codacy Cloud CLI documentation, or read the source on GitHub.